Organizing Cover Art Images
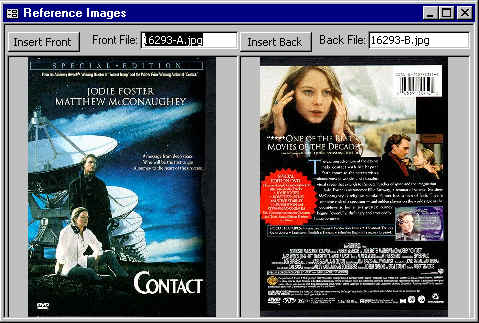
The Images form can be used to organize pictures or scans related to the laser disc or DVD. Two images can be stored for each title. The left image is known as the Front Image and is usually the front cover of the laser disc or DVD package and the right image is known as the Back Image and is usually the back cover of the laser disc or DVD package.
The My Image form is a tracking form and will follow the current title that is displayed in My Catalog. Normally you would open the My Image form as a companion form to the My Catalog form. Displaying images can slow down the operation of the My Catalog form.
Images are stored as individual files. The file name is displayed in the text box located at the top right side of each image. Only the pointer to the image file is stored in the database. This avoids the database bloating that occurs if large numbers of images are stored inside the database file. As a result of this storage method, a database backup will not contain the images themselves. To back up the images, you must copy the image files to a backup location or storage device. The default location of the image files is the folder C:\Program Files\Laser Disc Register\Images\
If you have previously saved an image to a file, use the Insert Front or Insert Back command button to select the file to be inserted. A copy of the file will be made from the original location to the folder used by the DVD Register. You can use either *.BMP of *.JPG files with this method.
Double click with-in the image frame to paste an image into the form that has previously been copied to the clipboard. Files that you paste from the clipboard will be saved in JPEG format.
You can work with images by right clicking the mouse while hovering over the Front or Back Image. This action brings up the short-cut menu for each image.
Paste
Use the paste command to paste an image into the form that has previously been copied to the clipboard. If the paste command is disabled (grayed out) then no image is available on the clipboard. File that you paste from the clipboard will be saved in JPEG format.
Delete
Use the delete command to remove an image that you no longer want or you have inserted by mistake. The deleted image will be deleted from the folder of stored images. The open command performs the same procedure as the Insert command button.
Open
Use the Open command to select the file to be inserted. This performs the same function as the Insert Front or Insert Back command buttons.
Use the Options command to open the Option form and select the Image Tab.
Cut
Use the Cut command to remove the link to an image but no delete the image file. A pointer to the image will become available to Paste Special at a new location.
Paste Special
Use the Paste Special command to paste a link that you cut with the Cut command. The combination of Cut and Paste special permits you to move an image to a new location.
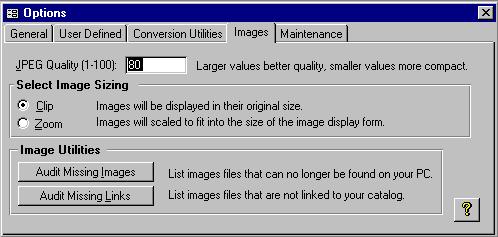
JEPG Quality
The JPEG image format is an image file format that uses a compression method that can lose some information contained in the image. You can control the amount of compression and the quality of the saved image with the JPEG Quality option. This option can range from 1 (most compression and most image loss) to 100 (least compression and least image loss). The default value of 75 produces good quality images and good compression. Use the Tools:Options command to set the JPEG Quality option.
Image Sizing
Images can be displayed either in the original size that they were saved or can be resized to fit within the form at the original aspect ratio of the image.
Image Utilities
Since the images are stored separately from the database, two utilities can be used to audit the consistency of the links in the database to the stored images. The Audit Missing Images command will find any pointers for which the related images cannot be found. The Audit Missing Links command will find any images for which there are no related pointers. Both commands will create a text file in the same folder that the images are stored. When the command is done, the file will be opened into the notepad application.
![]()